

The Manage Students page can be accessed by Enriching Students admin users. This page allows admins to add new students, edit the information for current students, and remove students from the system. First, let's start with how to add a student.
Adding a Student
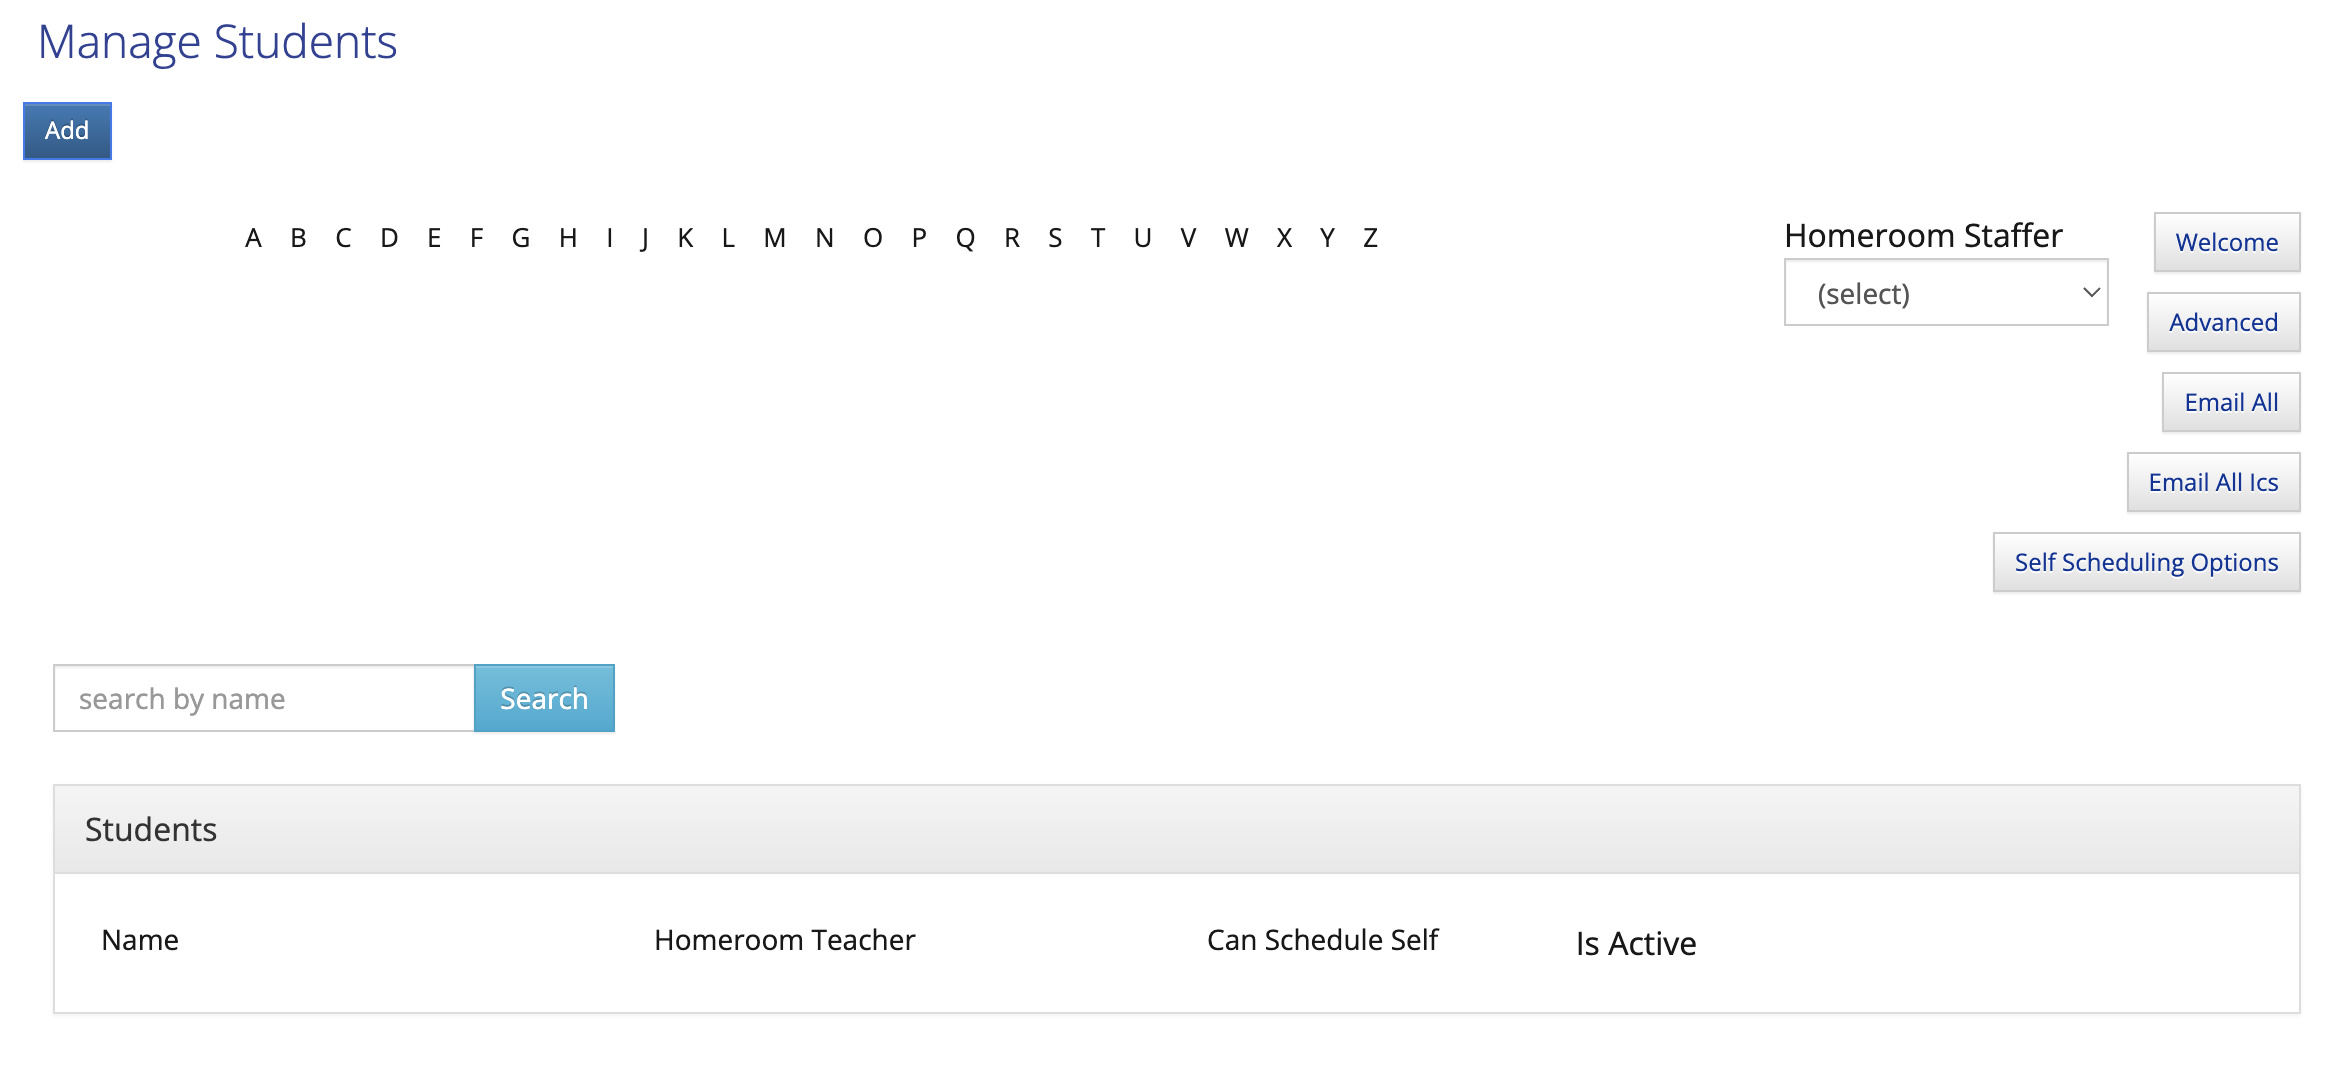
First, logged in as an admin, go to Settings in the navigation. On this page, in the Manage Staff & Students box, select 'Manage Students.' This will open up a page with a list of students that will look like this:
To add a new student, click the button at the top left of the page that says 'Add.'

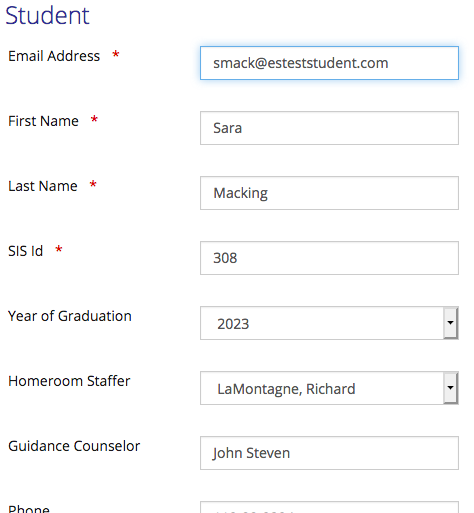
This will take you to a page where you can enter all of the new student's information. Asterisks indicate required information. Add the student's email address, name, and SIS ID. The SIS ID should match the student's ID in your Student Information System.
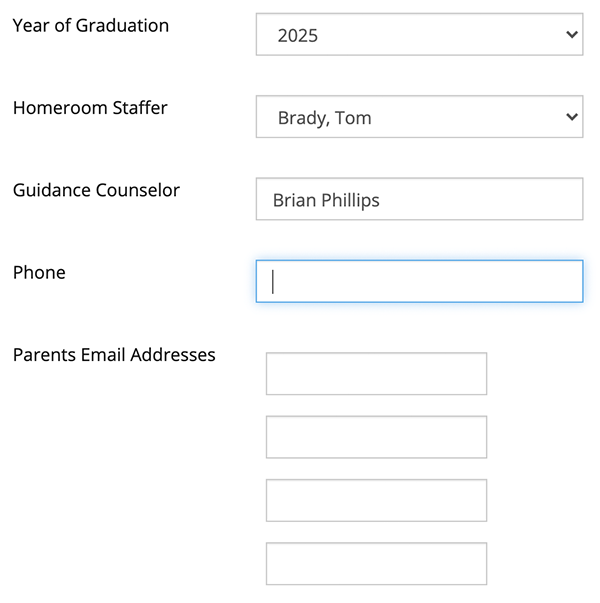
Other fields that are helpful, but not required to save the student in the system, are: year of graduation, homeroom staffer, guidance counselor, phone number, and up to four parent email addresses.
Next, check 'Is Active' to make the student visible in the software, and available for teachers to schedule. As the note explains in the image below, if you activate a student, schedule them, then set them to inactive, all future appointments will be deleted.
Then, check the 'Can Schedule Self?' box if you want to enable this student to schedule themself for appointments. If you check this box, another will appear that, if checked, will allow the student to override appointments teachers make with them. And the last box, 'Send Welcome Email' may be helpful to check for this new student because it will send them an email with their login information so they can begin using the software.
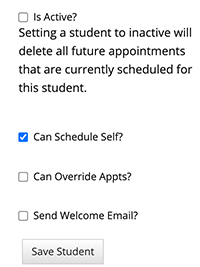
Once you have entered all of the information, select 'Save Student.'
Update as of April 2022
Previously, if a school was using Clever or One Roster, it was not possible to add a new student via the web site. Students would only be added via Clever or One Roster. This was due to fact that a student that had been manually added would be soft-deleted when the import process was run.
As of April 2022, a change has been made to the process of adding a student. There is now an option, "Ignore On Import" that you can select when saving the student.
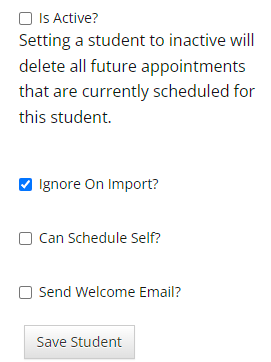
As the name indicates, when this option is selected, this student will be ignored when the import process is run. No updates will be applied to their record, and they will no longer be marked as soft-deleted.
Editing a Student
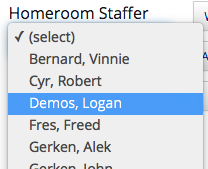
You can also edit a student currently in the application. First, you'll need to find the student you want to edit. You can do so by using the 'Homeroom Staffer' drop-down, to select their homeroom staffer, and then select the student in the 'Students' box.
You can search for the student in the search box, by using at least 2 letters from their name.

Or, you can select the letter of the alphabet that corresponds to the first letter of their last name.

Once you've found the student you want in the 'Students' box, click their name.

This will take you to a page with all of that students information. Type in the labels to update their information, or select different options in the drop-down menus. When you have made the necessary changes, click 'Save.'
Note: When editing an existing student, Enriching Students will move any existing advisory appointments from the original advisory teacher, to the new advisory teacher automatically.
- Edit the student and set the advisory teacher to a new value.
- When you save the record, any advisory appointment that does not have attendance taken for it will be moved to the new staffer. The course and the instructor will be updated to the new advisory and advisory staffer
- The number of seats is NOT automatically adjusted. This might make it appear that the teacher is overbooked if there are now more appointments than the max number of students for those days.
When adding a new student, it's possible to have Enriching Students create homeroom appointments for that student automatically.
- As an admin, you'll have to first ensure that your account is set to have one or more days set to prebook. Read the article.
- Once the days of the week have been set, simply add a new student. As part of creating their record, you will set their advisory teacher.
- When you save the record, the new student will automatically be booked into that teachers advisory for the entire year.
- The number of seats is NOT automatically adjusted. This might make it appear that the teacher is overbooked if there are now more appointments than the max number of students for those days.
Deleting a Student
You can also delete a student on the Manage Students page. To do so, search for the student you want to delete by selecting the first letter of their last name in the alphabet list, or use the search bar and enter at least 1 letter in their name.

Once you have found the student you're searching for, select "Delete" button next to their name.
Clicking the delete button will prompt a confirmation. If you confirm, the student will be removed from the system.
Note: This is especially important when you plan to add or transfer a student to another school. Since all user Ids must be unique, a student's email (which is their user id) cannot be used twice, even if in another school. The student would need to be removed (deleted) from one school and then added to another.
Watch the video:
Keywords: manage students, add new student, delete students, edit students, activate student, make student inactive, remove self-scheduling for a student, send student welcome email, allow student to override appointments
Comments
0 comments
Article is closed for comments.