

The Scheduling Page Overview explained the basic features of the Scheduling page, where you can view your students schedule for the week, quick schedule students, and more. But what if you want to schedule your students to a course you don't offer? Or for a repeating range of appointments? You can do this on the more detailed scheduling page. How?
On the Scheduling page, find the student you want to schedule, preferably on the day you want to schedule them. Click the button that says 'Schedule'. This will redirect you to a page with more scheduling options.
Current Grades
You can get an idea of what course a student might need to be scheduled for by checking their grades in the 'Current Grades' box. If your school has set a specific grade and lower as 'struggling,' this grade will appear highlighted in yellow.

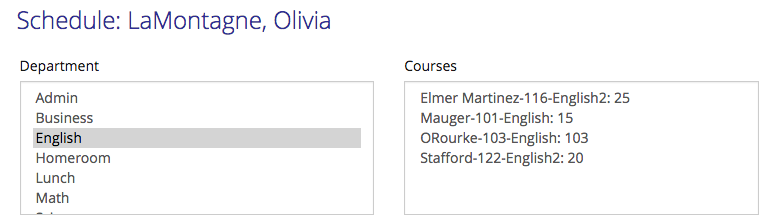
Department and Course
Choose the department, and course you want to schedule the student in. This way, you are able to schedule a student to another teacher in another department if you wish.
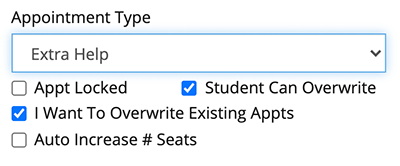
Appointment Types and Options
Select the appropriate appointment type in the drop-down. You have the option to lock this appointment by checking the 'Lock Appointment' check box, which means that other teachers will not be able to overwrite your appointment. By checking the 'I Want to Overwrite Existing Appointments' box, whatever appointments this student is currently scheduled for, if they are not locked, will be removed. Also, if your school enables students to schedule themselves for appointments, you can check the 'Student Can Overwrite' box, which will enable that student to overwrite this appointments if they wish. Another selection you may see is 'Auto-Increase # of seats.' If the course you have selected no longer has seats available, this option allows you to automatically increase the # of seats in order to be able to schedule this students.
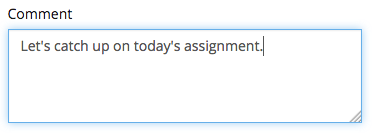
Comments
Optionally, you can add a comment. This will display on the Scheduling page as a speech bubble icon. Other staffers will be able to click on the icon and read the comment to see why you are scheduling the student. In addition, if your school has enabled students to receive scheduling comments, they will see this comment as well. Learn how this can be set by an admin on the Configuration page.
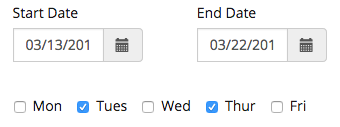
Select a Date or Date Range
By default, whatever day you selected 'Schedule' for, will be the date automatically selected here. You can leave the start and end dates the same to schedule the student for a single date. Or, you can choose a range of dates, whether it's a span of a few days or a few weeks. Then, you can check the days of the week you want this appointment to repeat on.
Watch the video:
Please note, we no longer display the Current Appointments box shown in this video.
Keywords: schedule student for repeating days, schedule student for recurring appointments, lock appointment, student can overwrite appointment, auto-increase seat count, schedule student to another teacher, add schedule comment, view student current appointments, view student grades
Comments
0 comments
Please sign in to leave a comment.