

There may be instances when you want to schedule an entire group of students, but to another teacher's course. How can you do this?
To start, go to the Scheduling page, which you can get to by selecting 'Scheduling' in the navigation. The first thing that you'll want to do is find the group of students that you want to schedule. You can do this by filtering with roster tags. Select the rostered group of students you want to schedule.
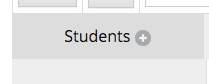
Next, click the expand icon next to 'Students.'
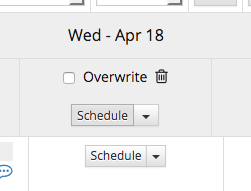
Go to the day you would like to schedule the group of students. On that day, click the button that says 'Schedule.'
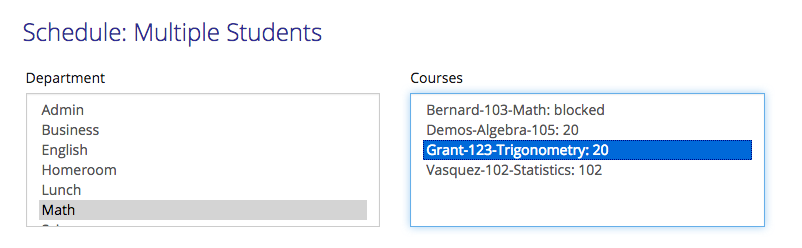
This will select that group of students, re-direct you to the Schedule Details page, where you have a variety of options to schedule this group. Note that at the top of the page it says 'Schedule: Multiple Students.' This shows that you are scheduling a group. Now you can choose to schedule this group to any staff member, by selecting the department and the course you want to schedule.
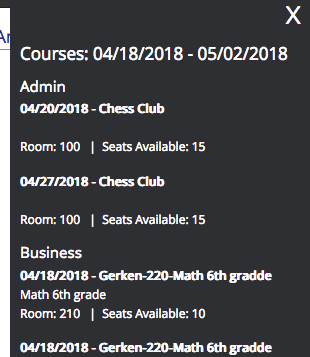
By clicking 'Course Descriptions' in the top left of the screen, you can view all upcoming special course offerings in the next two weeks as well.
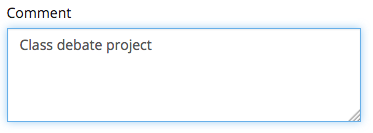
Next, you may add a comment if you like, to let the students know why you are scheduling them.
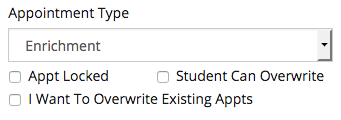
In the drop-down, select the appropriate appointment type. The check-boxes underneath the appointment type drop-down give you options for this appointment. By locking the appointments, you can prevent other staff members from scheduling or overwriting these students' appointments. If your school allows students to schedule themselves, the 'Student Can Overwrite' box, if checked, will let the students overwrite the appointment you're making. The 'Overwrite Existing Appointments' will delete any current appointments students you've selected may have. This is useful if the appointments that you're making for the students need to take precedence. Note: If a student in your group is already scheduled to another teacher and that appointment is locked, you won't be able to overwrite it. Learn how to unlock appointments here.
In addition, if the teacher does not have enough seats for this number of students, you will see the 'Auto-increase # of seats' checkbox. Checking this will automatically increase that teacher's seat count to accommodate the number of students.
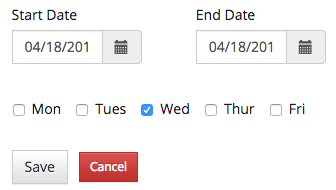
Next, select the day or days you want this appointment to occur on. By default, the date that you selected on the scheduling page will be selected, but you can change the date to whatever you'd like.
To learn more about using this feature for creating recurring appointments, read the 'Schedule a Student to Repeating Appointments' article.
Watch to video below to see a demonstration of how to schedule a student group with the quick schedule method, or schedule them to another teacher as explained in this article:
Keywords: schedule group, schedule a roster, schedule a group of students to another teacher, scheduling groups
Comments
0 comments
Please sign in to leave a comment.