
You may want to use your flex time to create unique course offerings for students. Maybe this would be a study session for specific students, a class extension, or perhaps an enrichment opportunity. You can use Enriching Students to create custom course offerings.
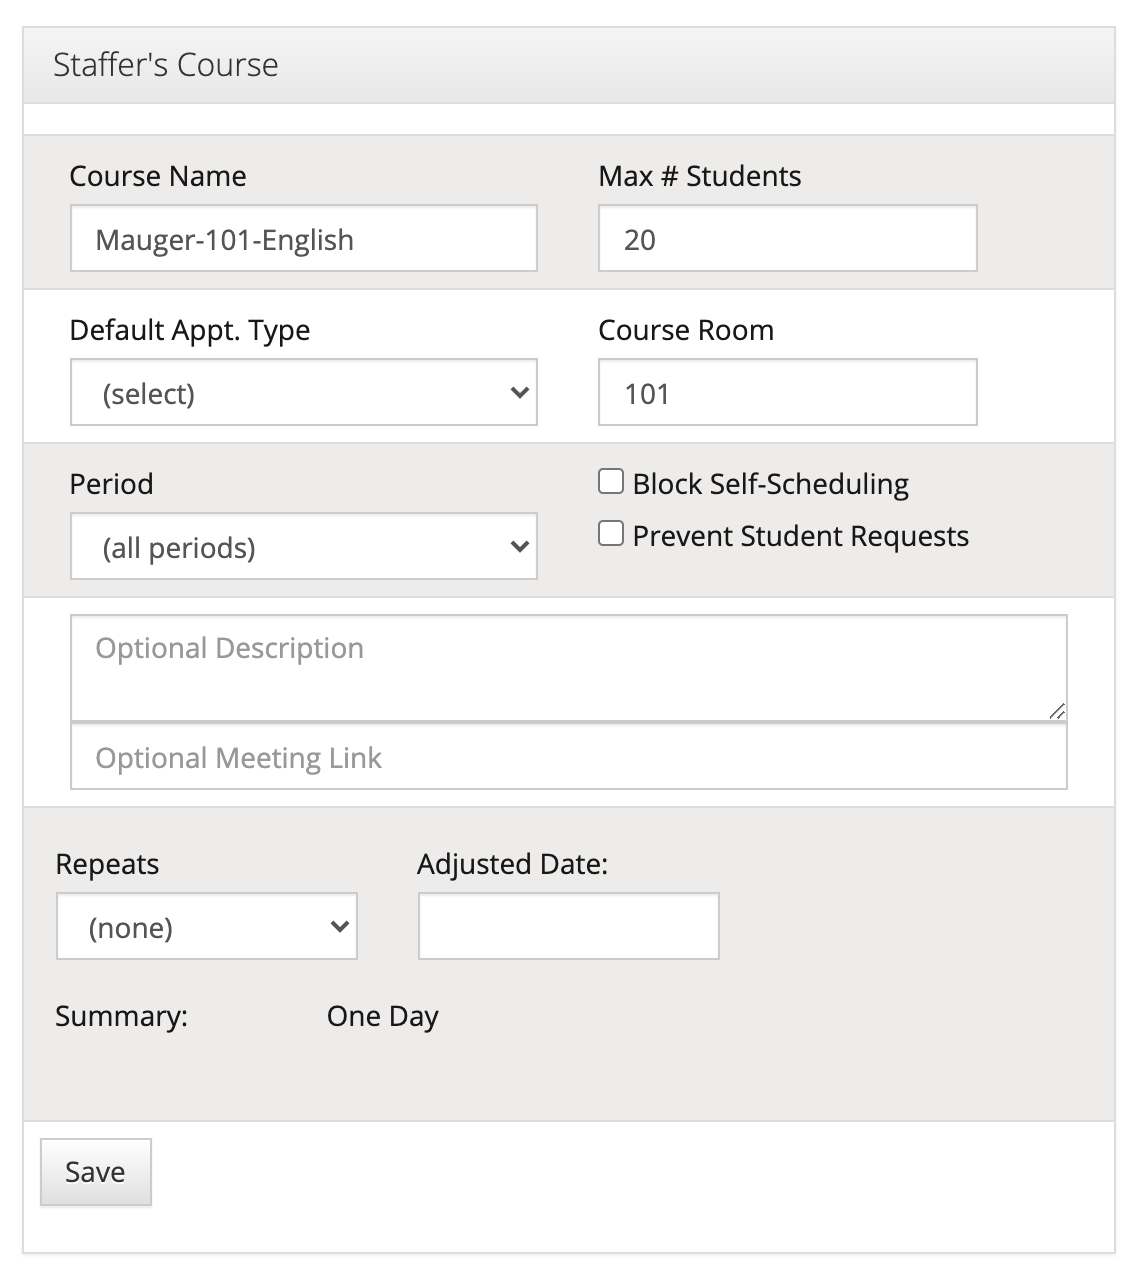
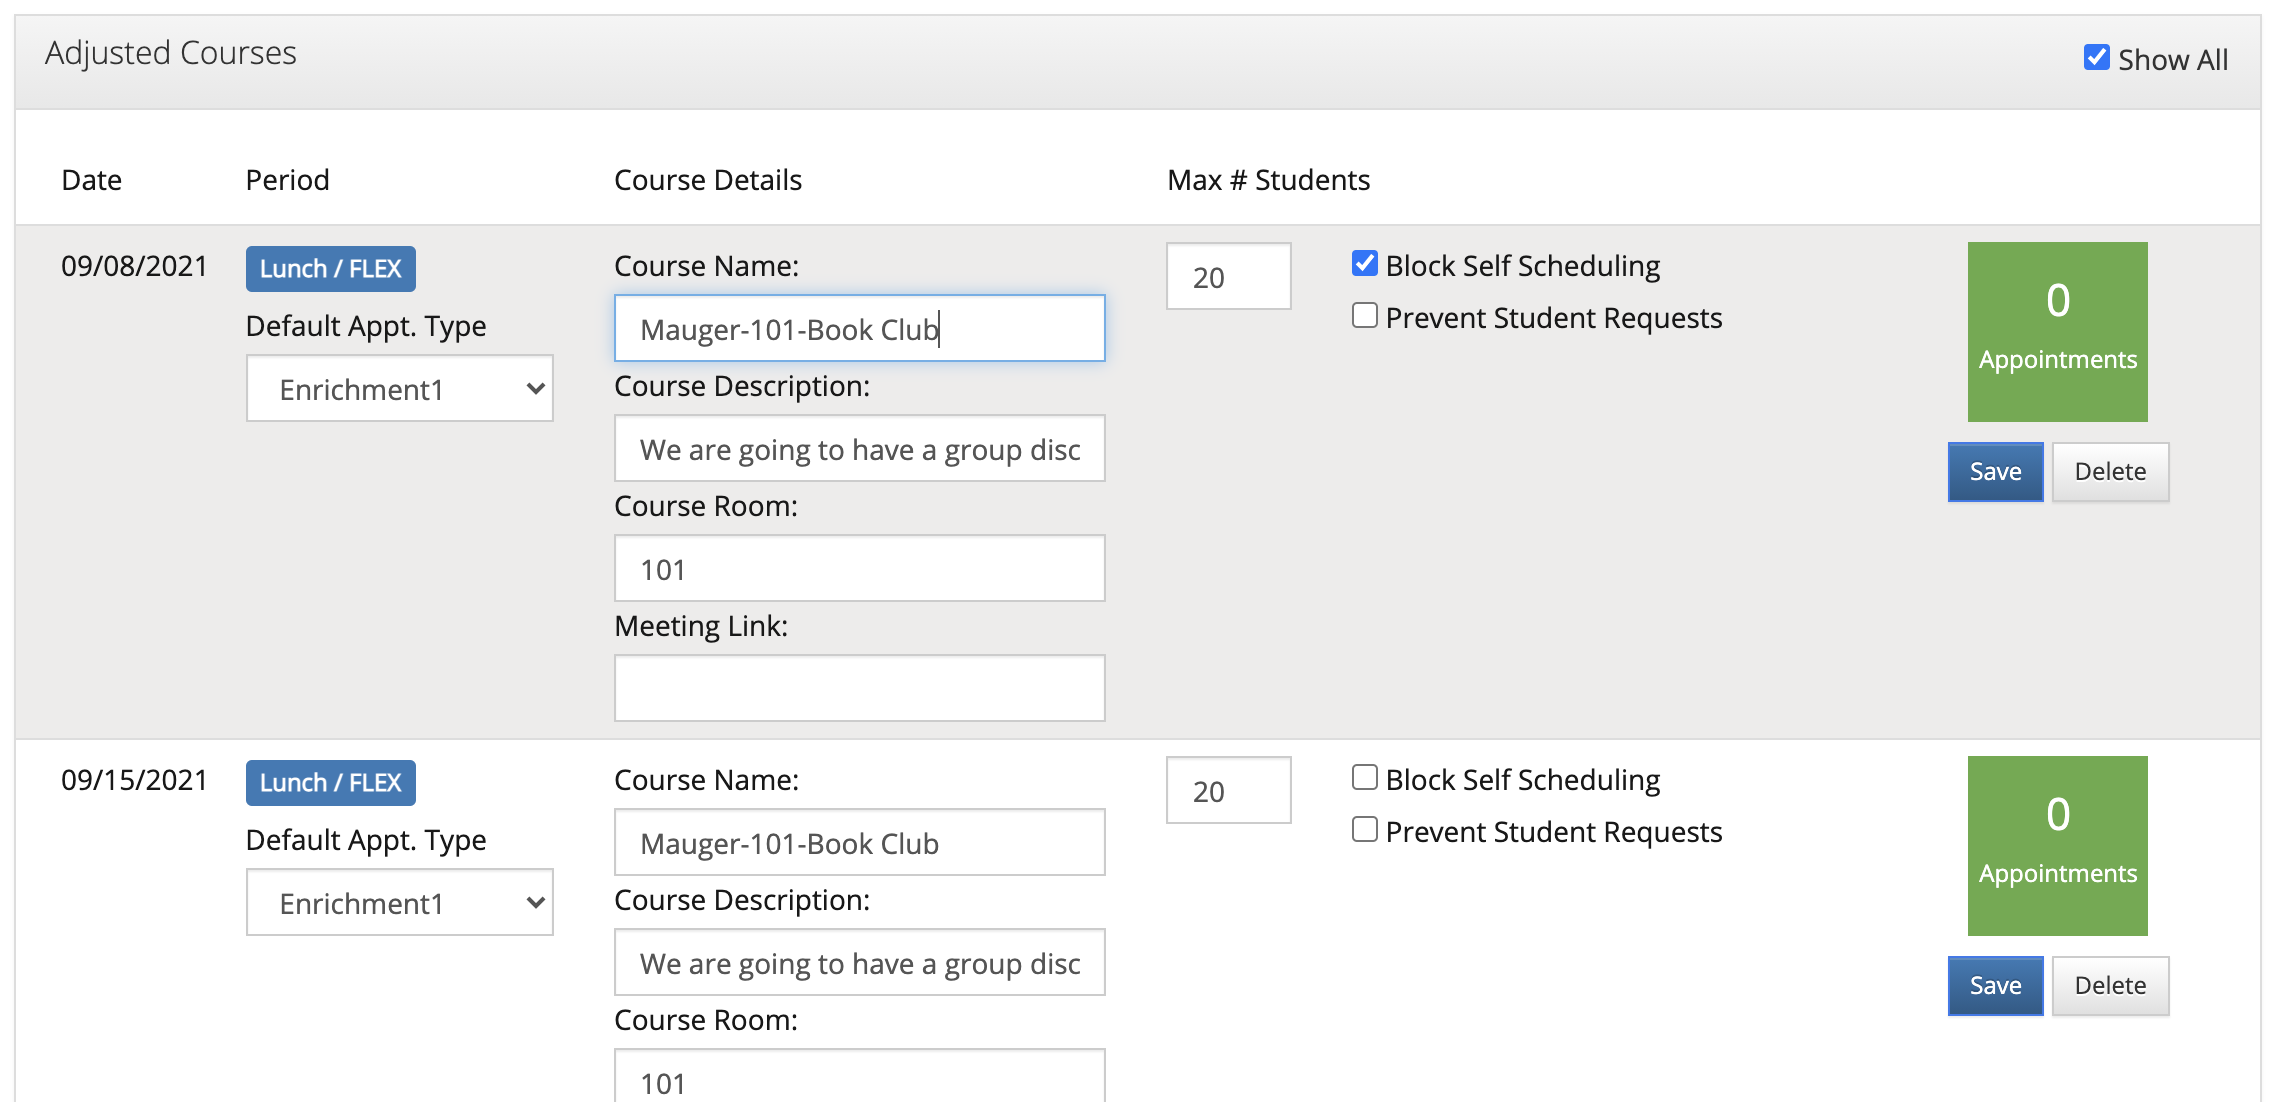
To start, go to the 'Course' page by selecting course in the navigation. The 'Staffer's Course' box automatically selects your teaching course. The box at the bottom of the page, 'Adjusted Courses', shows any current upcoming special courses you have created. You can check the 'Show All' box to see all of the courses you have made in the past.
Create a Custom Course
- Adjust a course name
- Adjust the max number of students
- Change the default appointment type for a course
- Add a Zoom or Google Meets virtual meeting link
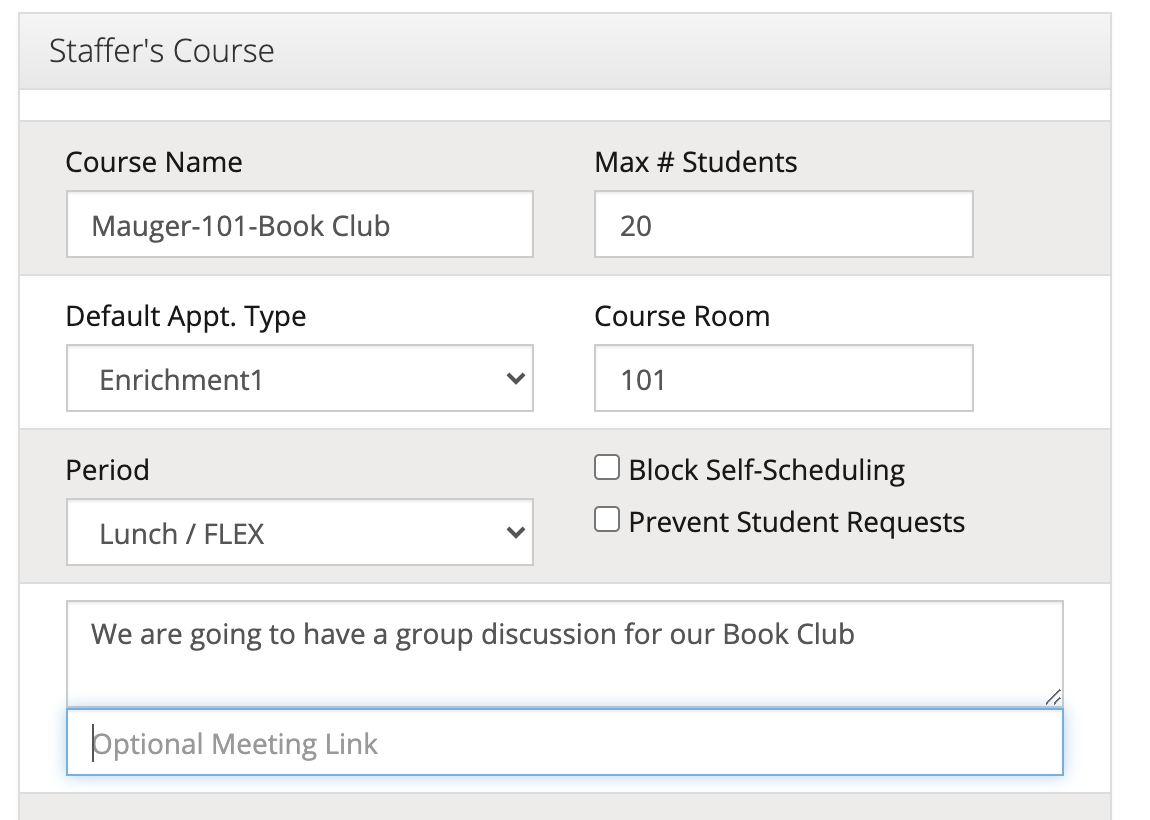
To create a custom course, go to the 'Staffer's Course box.' Type in the labels to change the course name, Max # of students, default appointment type, and room number. One important note here is that for the Max # of students, you cannot set it to be below your assigned number of students. This is something set by a site admin. For example, if you are assigned 15 students, you can set the Max # of students here to be higher than 15, but not less than.
Next, if your school has multiple periods, you can choose what period or periods this course will occur in. In addition, if your schools allows students to schedule themselves for appointments, if you wish to prevent students from self scheduling into this course, check the 'Block Self-Scheduling' box. For students who are only able to request appointments, if you wish to prevent them from requesting appointments for this course, check the 'Prevent Student Requests' box.
Optionally, you can add a description for this course, which will help students know what this course is about. Next, you will want to choose when this course will occur. If this is going to be a course that is help virtually, you can add a Zoom or Google Meets link in the 'Optional Meeting Link' label. This optional link will only be visible to students who are scheduled into this course. They will see a link on their schedule that say 'Join Meeting' that will take them directly into the scheduled meeting.
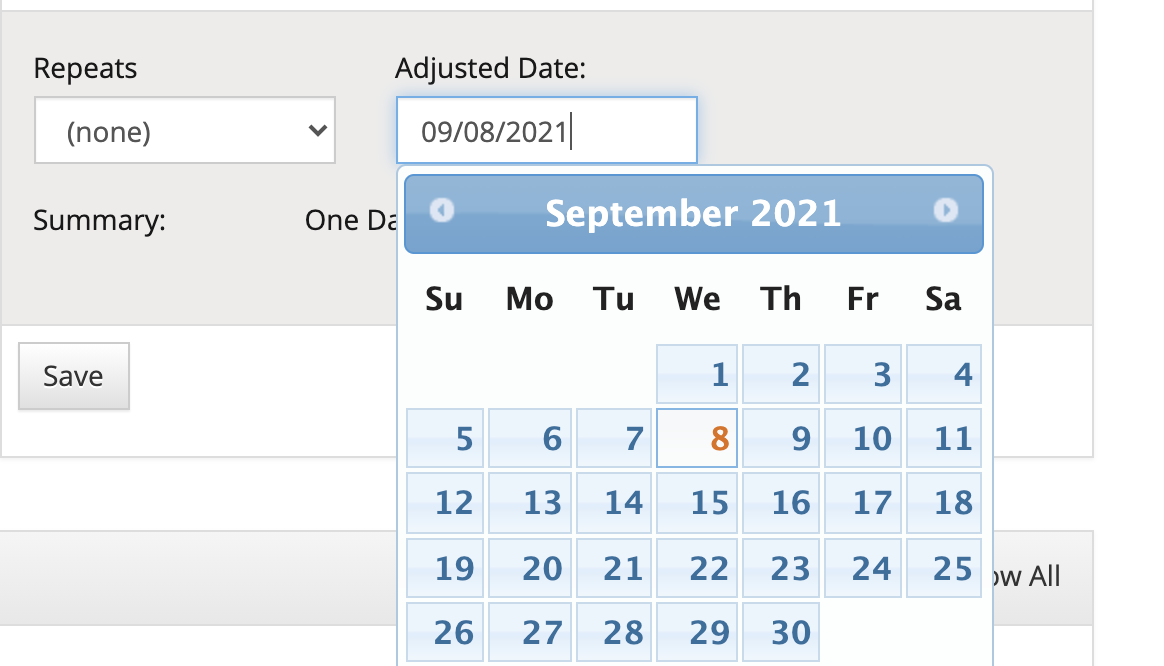
Next, set up the date you'll be offering this course on. You could choose to create this course for just one date. To do so, click in the 'Adjusted Date' label, and select the date on the calendar that pops up.
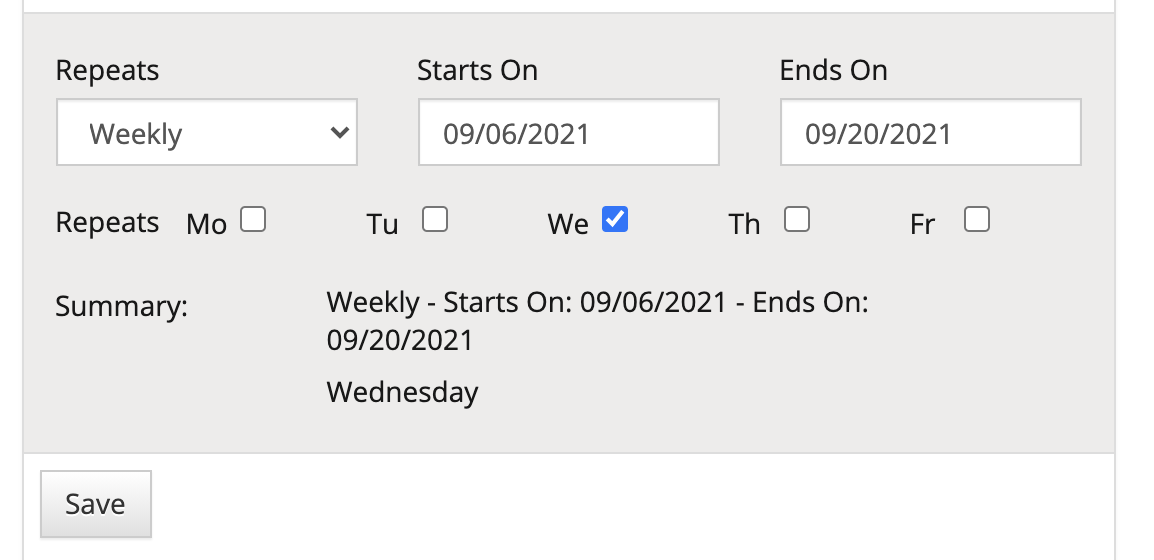
Or, you can set up this course to occur repeatedly within a range of dates. To do this, in the 'Repeats' drop-down, you can choose Weekly, Every Other Day, or Every Other Week, and then choose a start and end date range for it to repeat in. If you select 'Weekly', you can then also check the days of the week you want this appointment to repeat on. The Summary at the bottom of the box will help you to see what dates you've selected. When you are finished, click 'Save.'
*Please note: If you are creating an adjusted course offering for a day and period when students are already scheduled to you, these students will be automatically scheduled into this adjusted course.
Edit Your Custom or Adjusted Course
Now your course will be added to the 'Adjusted Courses' box. Each day that the course occurs on will show separately. This allows you further edit the course name, seats counts, and more, for a specific date. Just be sure to click 'Save' after making any changes. You will also see how may appointments have been made for that course.
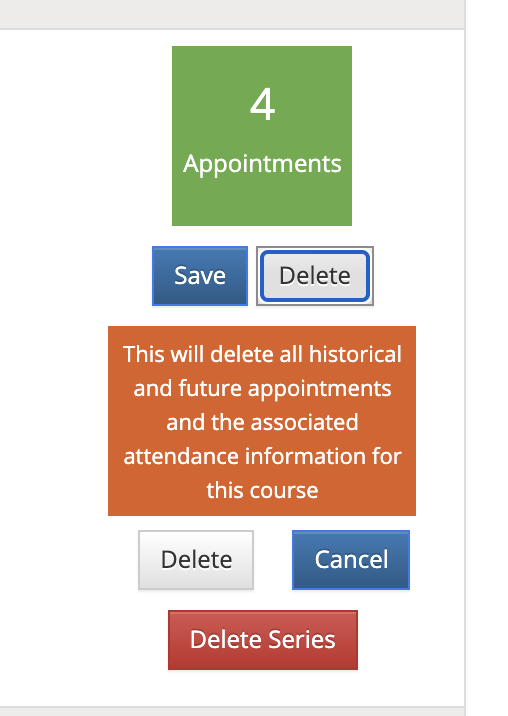
Delete Courses
- Delete an adjusted course for a single date
- Delete all adjusted courses
You can delete your course for a specific date is you wish, or delete the entire series of courses you've created. When you click 'Delete' next to a course offering, there will be a variety of options. Select 'Delete' to delete the course for just that one day, or click 'Delete Series' to delete all of the custom courses in that series. Please note: When you delete an adjusted course for one day, or an entire series, all appointments in the series will be deleted. This includes the record of these appointments in the past. If you took attendance for past appointments, the attendance records will be deleted as well. So unless you are deleting future adjusted courses, be very cautious when deleting adjusted courses. If you don't want to delete anything, select 'Cancel'.
This feature allows you to make minor course adjustments, such as the course name or seat count, on a day to day basis, or create special course offerings that will give your students a variety of enrichment opportunities.
Keywords:
Adding a class, Creating classes, adjust courses, create special offerings, create custom courses, delete courses, edit courses, zoom link, google meets link
Comments
0 comments
Article is closed for comments.