

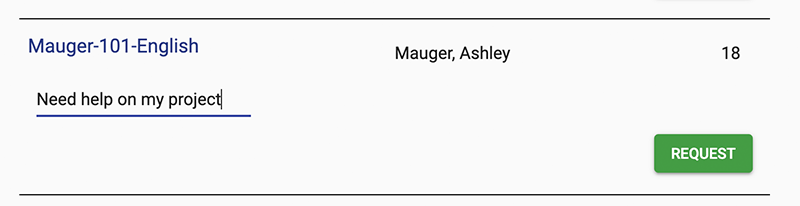
The Request page shows appointment requests students have made. Some schools allows students to schedule themselves for appointments, others only allow students to request appointments. When a student makes a request in their Enriching Students account, they will go to their Schedule page, find the teacher they want to see, and type in the reason they want to see them. That will look something like this:
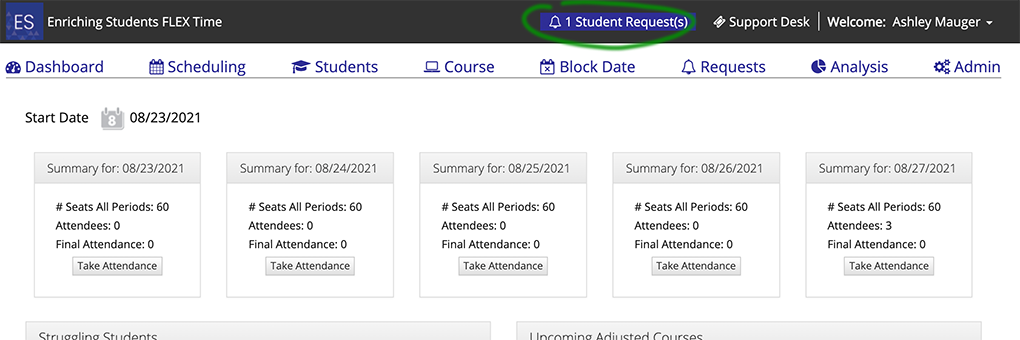
Once they've made a request to see you, you will get this notification at the top of your screen when logged into your Enriching Students account. You can see this circled in the image below.
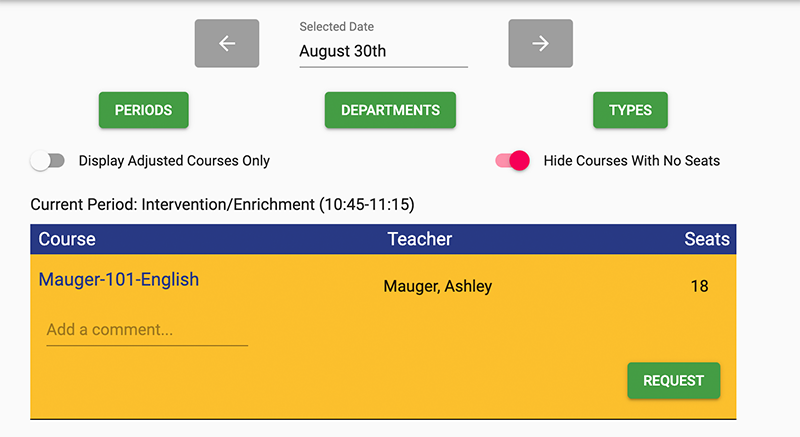
On the student end, once they've selected the 'Request' button, but they are not yet scheduled, it is considered a 'pending request'. As a result, their pending request will be highlighted in yellow on their schedule page, as seen in the image below.
To complete a student's request, you can either click the notification you see at the top of your screen, or you can select 'Request' in the navigation.
On the requests page, you have two different options to view requests. One is the 'Unscheduled Requests', which shows you all of the students requests that have been made to you, but haven't been scheduled yet. If you select 'Show All Requests', you will be able to view all requests made, including those you have already completed.
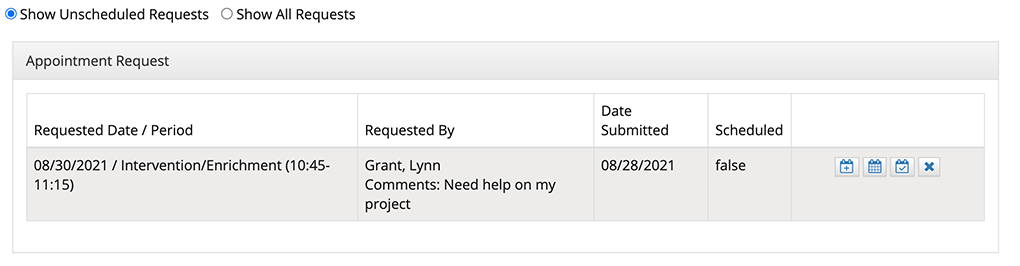
To complete student requests, you will need to select 'Show Unscheduled Requests.' This shows you which student made the request, their comment as to why the want to see you, the date and period they requested to be scheduled in, the date they submitted the request, and whether or not this student has been scheduled, either by you or another staff member.
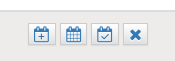
There are four different options for completing a student request. The first icon with the '+' symbol is the 'auto-schedule' option. By clicking this button, the student will be automatically scheduled to you on the first available date, within a nine-day period. Once scheduled, you will get a notification message that tells you what date this request was scheduled, and it will also no longer display under 'Unscheduled Requests', as it will have been marked as scheduled.
![]()
The second icon will redirect you to the schedule page, where you can choose the best fit for scheduling the student. If you use this method, you will need to go back to the request page and click the third icon with a check mark on it to mark the request as completed. Selecting that third icon is also an option for completing a request. Even if you do not plan to schedule the student on the date they requested, you can choose to simply mark any request as complete, confirm the action, and it will be removed.
The last option is to cancel the request. It may be that there is no longer a need to meet with the student. Clicking the button with an 'x' on it will cancel the appointment and remove it.
Watch the video to see this in action:
Keywords: student requests, scheduling a student request, completing a request, delete student request
Comments
0 comments
Please sign in to leave a comment.